OpenCV and WebAssembly
Disclaimer. This post is about how to use OpenCV (in the browser) and not OpenCV.js
Motivation
I decided to write a program with OpenCV on the web. The first thing I found was OpenCV.js which is a pretty nice version of OpenCV that can be called from Javascript. However, this is not necessarily what one might one. Mainly when you want all your operations to run faster or when you want to obfuscate your code.
One good place to look for some code is the Core Bindings because you can use or reuse some of the bindings. This is really neat when doing your application. Also look at the Javascript Helpers. This post have a lot of extracts of both files.
All the files for this project can be found in the following github project.
C++
Let’s see the small piece of C++. We name this file image.cpp.
#include <iostream> // for standard I/O
#include <string>   // for strings
#include <iomanip>  // for controlling float print precision
#include <sstream>  // string to number conversion
#include <opencv2/core.hpp>     // Basic OpenCV structures (cv::Mat, Scalar)
#include <opencv2/core/bindings_utils.hpp>
#include <opencv2/imgproc/imgproc.hpp>
#include <emscripten.h>
#include <emscripten/bind.h>

namespace ems = emscripten;


int lowThreshold = 50;
const int maxThreshold = 100;
const int ratio = 3;
const int kernel_size = 3;

template<typename T>
cv::Mat cannyImage(int width, int height, const ems::val& typedArray){
    std::vector<T> vec = ems::vecFromJSArray<T>(typedArray);
    cv::Mat mat(width,height, CV_8UC4, vec.data());
    cv::Mat bwmat, rmat, detected_edges;
    cv::cvtColor(mat, bwmat, cv::COLOR_BGRA2GRAY);

    cv::blur( bwmat, detected_edges, cv::Size(3,3) );
    cv::Canny( detected_edges, detected_edges, lowThreshold, lowThreshold*ratio, kernel_size );


    cv::cvtColor(detected_edges, rmat, cv::COLOR_GRAY2BGRA);
    return rmat;
}

template<typename T>
ems::val matData(const cv::Mat& mat)
{
    return ems::val(ems::memory_view<T>((mat.total()*mat.elemSize())/sizeof(T),
                           (T*)mat.data));
}


EMSCRIPTEN_BINDINGS(my_module) {
    ems::register_vector<uchar>("vector_uchar");
    ems::class_<cv::Mat>("Mat")
        .property("rows", &cv::Mat::rows)
        .property("columns", &cv::Mat::cols)
        .property("data", &matData<unsigned char>);

    ems::function("cannyImage", &cannyImage<unsigned char>);
}
Let’s decompose some of the parts.
#include <iostream> // for standard I/O
#include <string>   // for strings
#include <iomanip>  // for controlling float print precision
#include <sstream>  // string to number conversion
#include <opencv2/core.hpp>     // Basic OpenCV structures (cv::Mat, Scalar)
#include <opencv2/core/bindings_utils.hpp>
#include <opencv2/imgproc/imgproc.hpp>
#include <emscripten.h>
#include <emscripten/bind.h>
This will include all the libraries that we need. emscripten is the library that we use to interface with the browser.
Let’s see now the function cannyImage. We create in this function a Canny Edge Detector.
std::vector<T> vec = ems::vecFromJSArray<T>(typedArray);
cv::Mat mat(width,height, CV_8UC4, vec.data());
This part of the code will take a Javascript array and transform it into an std::vector, then we transform to a cv::Mat type. Notice that we have 2 transformations, there might be a way to do it with only one.
// create intermediate and result objects
cv::Mat bwmat, rmat, detected_edges;
// transform color to gray image
cv::cvtColor(mat, bwmat, cv::COLOR_BGRA2GRAY);
// blur the image with a gaussian blur of size (3,3)
cv::blur( bwmat, detected_edges, cv::Size(3,3) );
// create the detection image
cv::Canny( detected_edges, detected_edges, lowThreshold, lowThreshold*ratio, kernel_size );
// transform the cv::COLOR_GRAY2BGRA color space so we can read it easier with the browser
cv::cvtColor(detected_edges, rmat, cv::COLOR_GRAY2BGRA);
We need to perform color space transformations. First to black and white in order to perform the Canny Edge Detector and then to cv::COLOR_GRAY2BGRA, this last one will allow us to grab the image easily through Javascript.
template<typename T>
ems::val matData(const cv::Mat& mat)
{
    return ems::val(ems::memory_view<T>((mat.total()*mat.elemSize())/sizeof(T),
                           (T*)mat.data));
}


EMSCRIPTEN_BINDINGS(my_module) {
    ems::register_vector<uchar>("vector_uchar");
    ems::class_<cv::Mat>("Mat")
        .property("rows", &cv::Mat::rows)
        .property("columns", &cv::Mat::cols)
        .property("data", &matData<unsigned char>);

    ems::function("cannyImage", &cannyImage<unsigned char>);
}
This part of the code is partially extracted from Core Bindings. to register the class. We also define the function CannyImage which is going to be readable from the browser.
In order to compile this file, if you downloaded the repository, it suffices to type.
make image-cpp
This will perform the following command line inside a docker container.
em++ `pkg-config --cflags --libs opencv4` image.cpp -o image.js -O3 -s NO_EXIT_RUNTIME=1 -s "EXPORTED_RUNTIME_METHODS=['ccall']" -s ASSERTIONS=1 --bind
It creates a wasm file which is our compiled file as well as a image.js file, which is the image we can call from our html file.
HTML (Image)
Let’s see the html file.
<html>
  <body>
    <canvas id="Canvas" width="400px" height="400px"></canvas>
    <canvas id="Canvas2" width="400px" height="400px"></canvas>
  </body>
  <script src="image.js"></script>
  <script>
   const drawImage = (url, ctx) => {
     const image = new Image();
     image.src = url;
     image.onload = () => {
       ctx.drawImage(image, 0, 0)
     }
   }
   window.addEventListener('load', function()
     {
       let canvas = document.getElementById("Canvas");
       let ctx = canvas.getContext("2d");
       drawImage("image.jpg", ctx)
       let imgData = ctx.getImageData(0, 0, canvas.width, canvas.height);
     }, false);
   function passImage() {
     let canvas = document.getElementById("Canvas");
     let ctx = canvas.getContext("2d");
     let imgData = ctx.getImageData(0, 0, canvas.width, canvas.height);
     const res = Module.cannyImage(imgData.width,imgData.height,imgData.data)
     const resultImg = new ImageData(new Uint8ClampedArray(res.data), res.columns, res.rows)
     let canvas2 = document.getElementById("Canvas2");
     let ctx2 = canvas2.getContext("2d");
     ctx2.clearRect(0, 0, canvas2.width, canvas2.height);
     ctx2.putImageData(resultImg,0,0);

   }
   setTimeout(passImage,200)
  </script>
</html>
As you can see, what matters is how we process the data in order to send it to the cannyImage function.
For starters, we need to send any image to a canvas tag. This is done by the function drawimage. Another important part is the following code.
let canvas = document.getElementById("Canvas");
let ctx = canvas.getContext("2d");
let imgData = ctx.getImageData(0, 0, canvas.width, canvas.height);
This part of the code allow us to extract the data of the picture than we are going to send then with.
const res = Module.cannyImage(imgData.width,imgData.height,imgData.data)
As you can see, this is the function that we pass from C++. Finally, we need to again transform the image to be readable by javascript
const resultImg = new ImageData(new Uint8ClampedArray(res.data), res.columns, res.rows)
let canvas2 = document.getElementById("Canvas2");
let ctx2 = canvas2.getContext("2d");
ctx2.clearRect(0, 0, canvas2.width, canvas2.height);
ctx2.putImageData(resultImg,0,0);
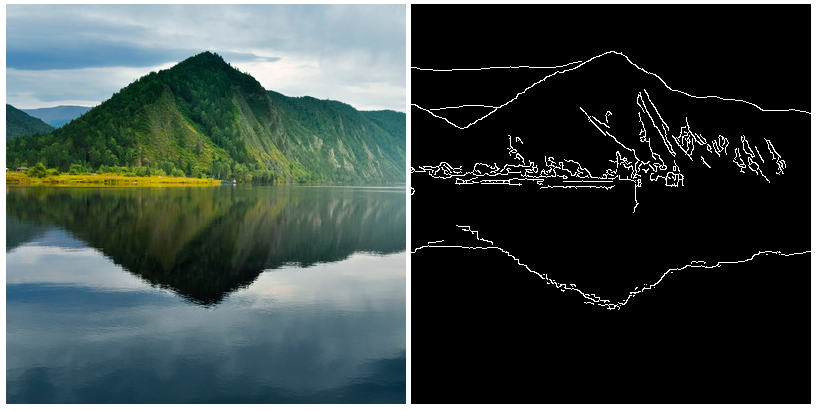
The result is as follows.

You can of course, load another image and it should work.
Warning: You will see in the project the file image.cpp and image2.cpp. Where the main difference is that we transform the function cv::Mat cannyImage to void cannyImage. This is very useful when you don’t want to create a variable every time.
HTML (Video)
The last part of the previous section ended with a warning. If we don’t consider this warning and we want to process a video, we will end up consuming a lot of memory and the computer will crash pretty fast.
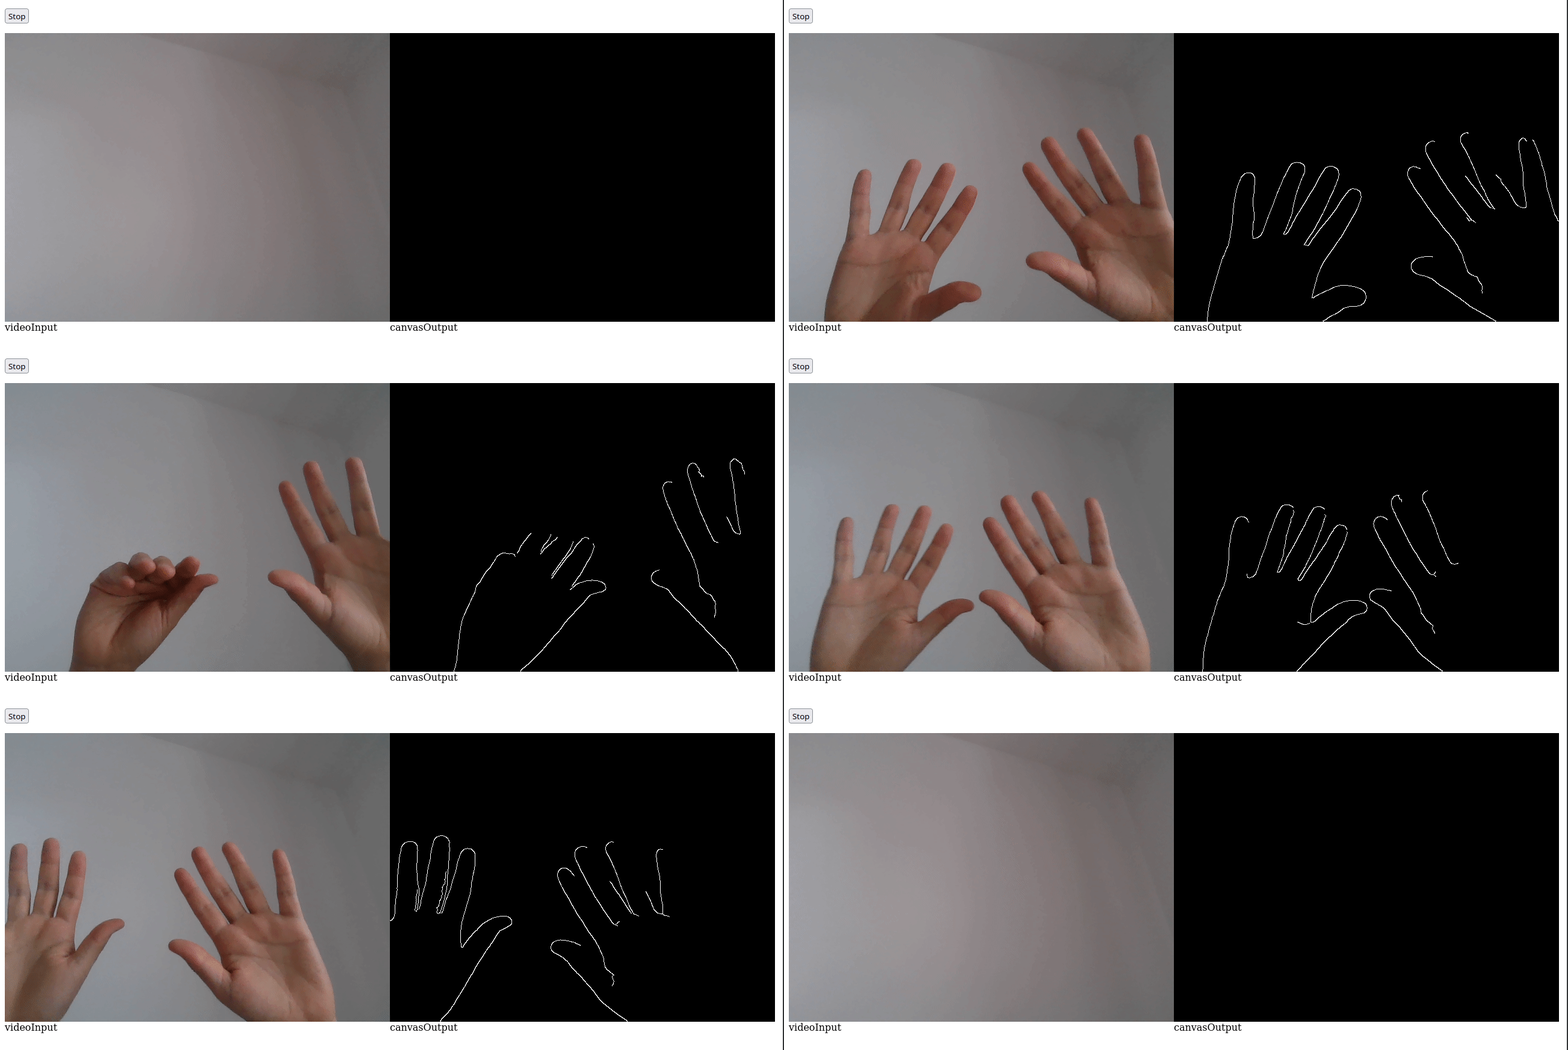
I let you see the following webcam2.html file. The requirements are kind of the same as for the image, the difference is that we need to configure the camera and treat its information at every frame.
Here is a gif of the result.

Conclusion
I hope this is useful for some people. Please be aware that we didn’t talk about C++ flags that we can use to debug the code, and we skip other important things (like one of the things that took a lot of time was to configure the environment). However, this is a bare minimum to start using OpenCV with WebAssembly without using the library OpenCV.JS.
I recommend to visit the github project and test it. Please verify mainly the version 2 of all the files (image2.cpp, image2.html, webcam2.html), in this way, we allocate and reuse the memory.
